 Ciwana
Black
Ciwana
Black
Fri
11
Sep
2015
Steampunk Top Hat - DIY/Tutorial
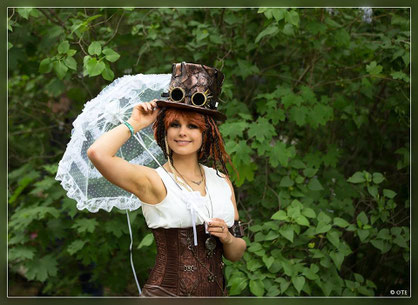
For the WGT 2015 I made my own steampunk hat. Since I am creating a new steampunk outfit at the moment, I needed a new hat as well. And maybe some of you want to make one on your own as
well:)
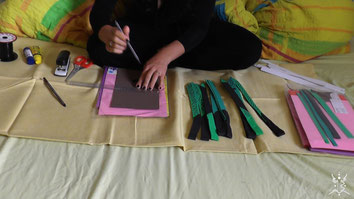
These are the things that you will need:
- a camping mat out of foam rubber for the main part of the hat
- a pen, a ruler, tape, scissors and a geometry compass.
- some sheets of paper and a measurement band
- for this type of steampunk hat you also require some textile (I choose a brown color)
- some things to decorate it like an old clockwork, buttons and parts of an old curtain
- a hot glue gun
For the hat I wore at the WGT I used foam sheets to make the little metal plates and painted the hat first black and then with bronze color.

The first step is to measure the circumference of your head. My head is around 56cm. You should add around 2cm to give some room for clearance. With the circumference you can calculate the diameter and the radius for drawing the pattern.

If you don´t have a big enough paper sheet for the pattern just clue some pieces together. I think for this hat 4 paper sheets should always be the right number unless you make a small hat for your child or doll.
Next mark the center of the circle and make one or two dots for the radius of your head. Make another dot a bit further outside to create a second bigger circle for the brim. Then use the geometry compass to draw the two circles.
Afterwards cut out the bigger circle. Then carefully cut out the inner circle so that you then have two patterns.
Depending on your head size glue two or three paper sheets together to form the side of your hat. The circumference of your head is the length of the long side of the paper sheets. So in my case
it would normally be 56 cm – but I made my hat bigger to fit over my hairpiece. The other side of the paper sheets determines how high your hat will be. Cut the side pattern for your hat as well
and then we can start with the camping mattress.
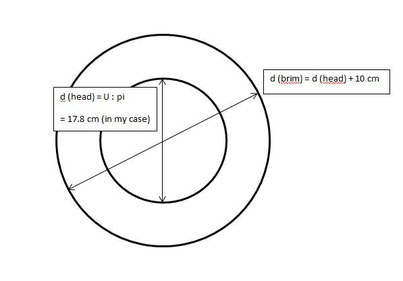
These are the patterns you will need.


Lay the pattern on it and draw them on the mattress. Then cut out the first part of the hat. Afterwards start with the next pattern. Be a bit careful when you cut out the inner circle, especially at the start so that you don´t make a big whole.
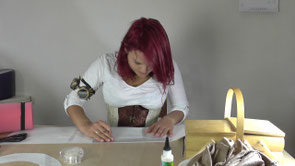
Now that we have all the hat pieces when can start gluing them together. Use an underlay so that you don´t mess up your table. Put some glue on the inside of the brim and glue the side piece to it before the glue dries.
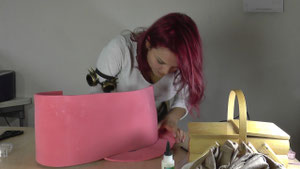
Work your way around the entire circle. When you glue the side piece inside the brim piece, your hat will get a bit smaller. If you didn´t add some extra cm to your circumfence you should glue the side piece on top of the brim piece.

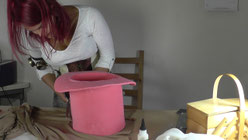
The final step is to glue the top piece onto the side piece.
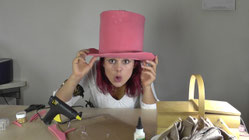
And now we have a pink plain hat.
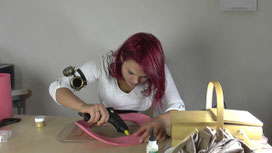
It´s time to decorate the hat now. For this model I used brown textile. First of all cut around the top piece. You don´t need to be too accurate because you will cover up the ends anyways.
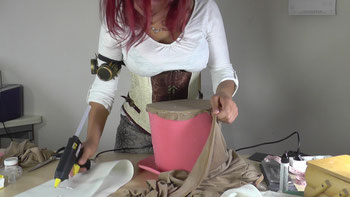
Then use some pins to pin the textile to the sides of your hat. And try out how the textile falls best. Cut away the textile that is too much. Then clue the textile step by step to the hat. First
the top piece and then the side piece. For this you should take out one pin after the other.
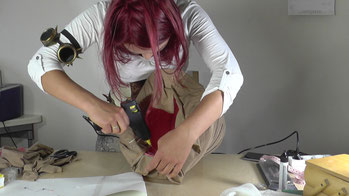
Where the side piece meets glue it to the hat as well. Then glue it to the brim.
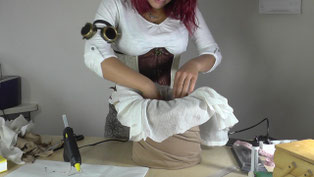
Use an old curtain for the inside of the hat. Cut and form it into a way you like it and then use the hot glue gun again. If needed use a needle and some thread to make some stiches to give the textile a better shade around the hat. I used some stiches around the brim.
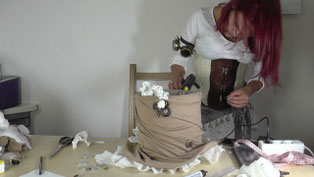
Then we can start with the small decorations. I used some parts of the old curtain and a clockwork to decorate my hat. Afterwards I also glued some buttons unto my hat. And a little more of the old curtain. Just put onto the hat whatever you want.
And then we are done. Maybe you want to try this out on your own. I would love to see some of your results.
You can watch the video as well, if you are unsure about any parts of the crafting process.
Mon
13
Jul
2015
Felt hairpiece Tutorial
I made a new Video in which I show you how to make a felt hairpiece like the one I wore at the WGT 2015. Maybe you want to try it out yourself. I would love to see some of your
pictures.
Mon
29
Sep
2014
HOW TO: Foamies for your CYBER/ GOTHIC/ STEAMPUNK HAIRPIECE - Part 2

This is the second part of how to make your own hairpiece. In this blog I will explain how to craft some foamies that can go into your hairpiece as well (like in my picture on the left^^)
The materials you will need:
Linked to Amazon again, but you can get them for other places as well.
Rexlace Plastic
Lacing
Foam sheets
Scissors, glue, stapler, pencils, pens...in any stationery shop close by :)
I decided to make some steampunk-like foamies in brown and white. For more cyber looking once you can take other colors like black and blue/ blue and white....

First: mark the foam sheet on both ends with little dots that are in the distance of your desired width - I usually make my foamies about 2cm wide.
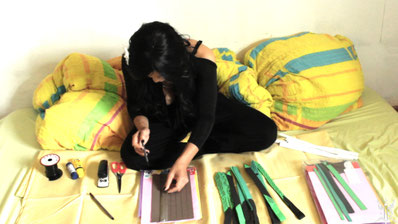
Afterwards connect the dots with thin lines so that you can cut the foamies in a straight line.
Cut the foam sheet. Mark and cut another foam sheet in another color you want to combine with the first one.
Make a loop with one of the foam sheets straps, while keeping the other one straight. Take both ends of the looped strap and glue it to one end of the straight strap.
Staple the looped strap/straight strap together to support the glue.
Cut the end of the foamie and give it a shape - for example shape it into a hemicycle or triangle. You can also give the ends of the looped straps some shape.
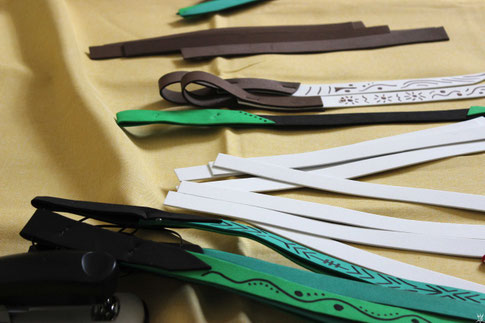
Decorate the foamie with some drawings or glue little bits and pieces of foam sheet on it.
You can make the foamies with different colored straps - like black + green or black + blue. You can put two or three straigth straps into one of the looped straps - also in different colors.
I usually make 3-4 foamies for each side of my hairpiece. I connect them with the Rexlace and attach them with it to the hairpiece.
If anything is unclear or it you prefer watching videos to reading ...I made one about how to make foamies as well :)
Sun
07
Sep
2014
How to make your own hairpiece/cyberfalls :)

Since I did get asked quite a lot of times how I make my hairpieces, I decided explain it in detail for everyone who is interested.
First of all the materials you need (I linked them to amazon, but you can get them from other places as well:
Synthetic dreads (4
packages)
Rexlace Plastic
Lacing
Crin Black
Crin Blue
Knitting wool
Hair ties: (at least 4)
...and scissors:)
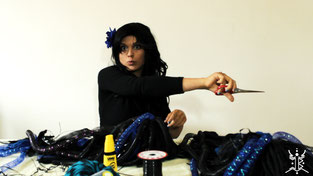
When we have all the materials assembled, we can get started :)
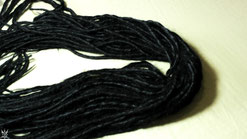
First you got to take the synthetic dreads - 2 packages for each hairpiece. I usally wear 2 hairpiece, one on the left and one on the right side (which makes 4 packages of synthetic dreads). Lay the dreads down and mark the half lenght of them.

Then tie the dreads with some plastic lacing in the middle together.

Afterwards you can add some wool. Synthetic dreads are pretty heavy, while wool is really light. Combining the dreads with black wool gives your hairpiece more volumes without making it to heavy.
Use the plastic lacing to make for example a bride or just simple cut it into the length of the dreads and add them to the hairpiece as well.
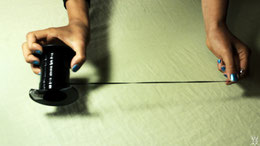

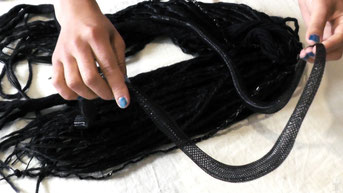
Cut the crin into the desired length - it´s nice to have some longer and some shorter ones (compared to the synthetic dreads). Then add it to the hairpiece as well. I usually use about 4 black
crin strings for each hairpiece.

Afterwards use 2 hair ties that you interloop. Then put them around the hairpiece and interloop them again. This should leave you with one loop that you can later one use to attach the hairpiece to your hair.

Now you can add whatever color you want - I used blue crin and blue wool for this one. Just put it thru the hair tie loop as well:)
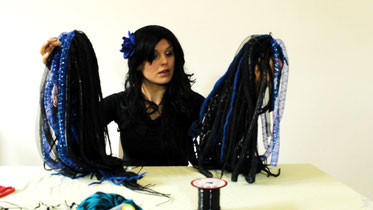
That´s it - one hairpiece done. Now repeat for the second one. :)
For a more gothic version you can just leave out the pastic lacing and the crin.
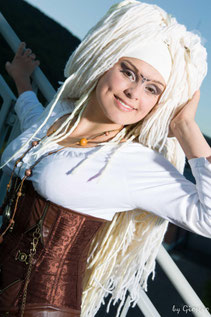
If you want to make a more steampunk like version, you can just choose the synthetic dreads in blond and add stuff that has a brown/fawn color.
I also made a video about it. If you don´t feel like reading, or something is still unclear to you, then you can watch it as well.^^


